A bottom-up or a top-down approach?
In order to be able to try something out, to proof something is technically viable, it is absolutely necessary to do early prototyping and provide ‘POTs’. A Proof Of Technology is just substantiating that there is a potential solution to a technical problem: We must emphasize that it is providing proof for a possible solution for a technical problem. This does not imply that the POT will become the solution in the final product. The idea is too learn as much as possible early on, and to get a grip on the domain problem challenges.
When there are lots of unknowns and problems, people are a bit anxious and our very first ‘human’ reflex is to find a solution for the perceived issue as soon as possible. Creative as we are, we do find a solution sooner or later, and then, we tend to hang on to that particular solution since it brought us ease of mind (, and it works of course)! But is it the right and best solution we can think of? Surely, we can and must think of more solutions and make time for that creative process. Most other solutions will be derivatives, some will offer refinement, others will be worse, but every now and then a new angle is discovered, leading to a better understanding of the problem and a new promising way of handling it.
In order to do this kind of creative fiddling, the embedded software specialist needs an instrument to hook on to the technology under investigation. Some platform, evaluation board and tool chain to try out and experiment with. Remember, it is not necessarily a choice that will already have impact on or lead to the final solution. Most of the time, professionals then choose the most familiar tools, or – if they do have some clue on the type of required controller hardware – a more intelligent guess can be made.
However, do not overrate this first selection.
So, bottom-up or top-down? Neither, and a bit of both, but this is the foundation of the bottom-up part. 😀
Selected platform(s)
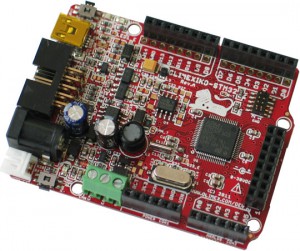
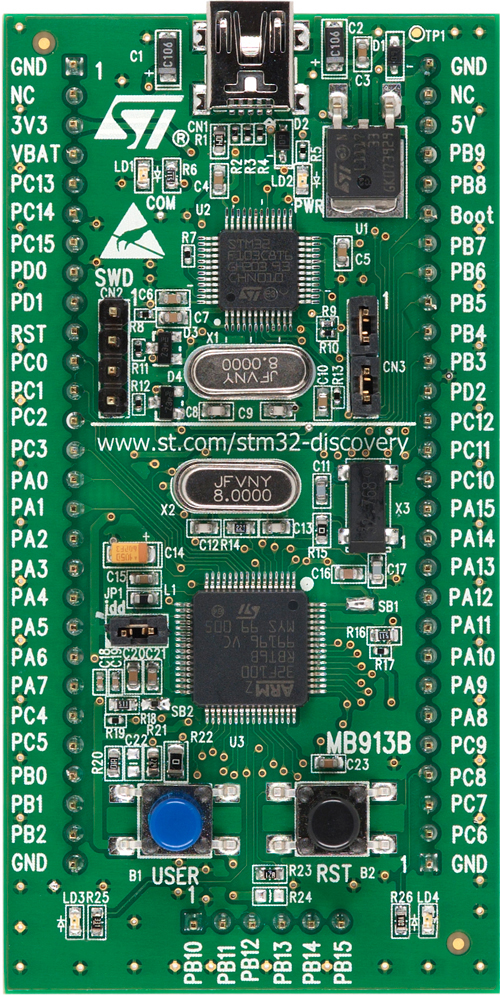
Our creative ‘fiddling’ platform(s) are the OLIMEXINO-STM32: “Industrial grade STM32F103RBT6 MAPLE like board with additional CAN”, and the standard STM32 Value Line Discovery board, … and variants.
The OLIMEXINO-STM32 has an ARM Cortex M3 (STM32F103RBT6) micro-controller which should be more than up to the task of energy harvester – slash – battery charger POTS’ing. That one is running at 72MHz;
the Cortex M3 of the ST Value Line Discovery board is running at 24MHz.
We can then play with digital IO and Analog to Digital (ADC) conversion to interact with electronics.
But Hardware is not everything, there is also need for
- a tool-chain: you do want to write code, compile, link and download code to the thing, right?
- Drivers: to talk to the board peripherals (IO and ADC for example).
- An (RT)OS or a scheduler that makes life easier to deal with individual tasks.
Why did we select these “toys” ?
- relatively powerful MCU (everything is relative of course)
- broad input power supply range (for the OLIMEXINO-STM32)
- advanced PWM available
- advanced ADC available
- USB might come in handy (in case of the OLIMEXINO-STM32)
- easy to interact with IO through headers
- open source tool-chain can be constructed
- there are several RTOS alternatives
- Lotta Bang for Buck: It’s cheap
- cheaper and more powerful than an Arduino.
- The MCU costs 2.7 USD / chip (in 1K quantities) at the time of writing, but depending on the “squeeze” later on when preparing for industrialization, we could go to 1.5 USD and then negotiate some more ;-). However, it is anticipated that the MCU will not be the dominant cost factor in the product.
The tool-chain
We selected this gnu ARM tool-chain at https://launchpad.net/gcc-arm-embedded since we are working on (Ubuntu 12.04) Linux.
We tried to follow the development guide of Peter Seng: http://www.seng.de/downloads/HowTo_ToolChain_STM32_Ubuntu.pdf.
But we had to improvise, here and there.
In short, listing the changes.
- We installed the GNU Tools for ARM Embedded Processors tool-chain (and added it to our PATH).
- Openocd was not installed from source but with “sudo apt-get install openocd” thus obtaining the standard openocd version that comes with ubuntu 12.04 and it seems to do its job. If you want, you can still use the latest source version from here.
- We adapted the build system more to our needs. (cfr. Test project).
- FreeRTOS was integrated in our test project. (cfr. Test project).
- Sheer horror until working linker directives were found. At the end, it always seems simpler than it was. (cfr. Test project).
Finally, the LEDs were blinking in a real-time task, which is a bit overkill for a led blink application, but there you go. 😉
Test project: real-time blinking leds with freertos
And the download link to the test project is here.


Speak Your Mind